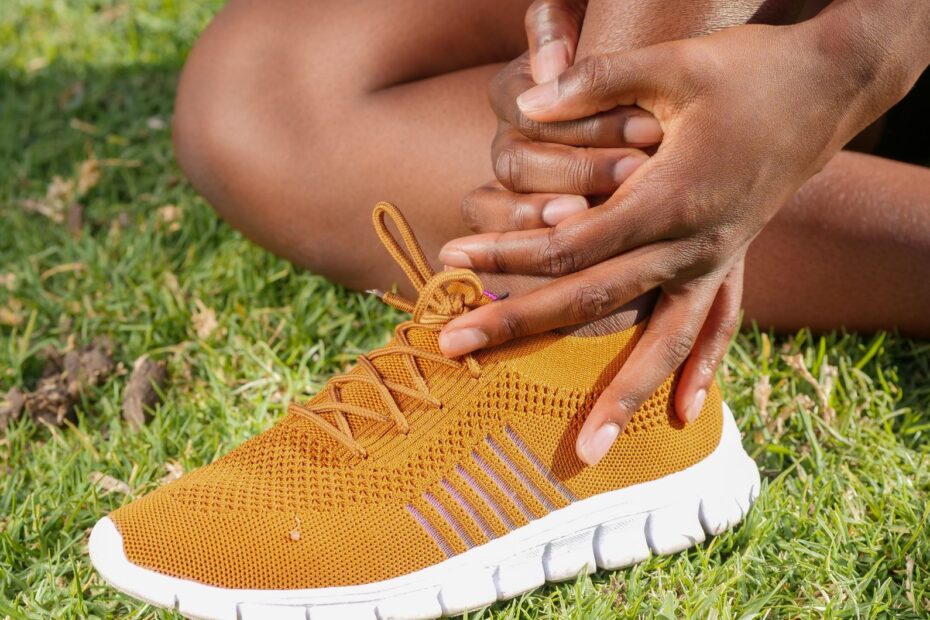
Pinpointing the exact contact point helps match the fix to heel movement, pressure, or a stiff shoe edge. A sliding heel needs less motion, while a hard ankle collar needs more room or a thin skin barrier. Your red spot gives you useful evidence.
You can use the rubbing pattern, shoe material, and a short indoor walk to choose padding, lacing, gradual wear, professional repair, or a return before sore skin gets worse.
The Contact Mark Identifies the Fit Problem
A hot spot forms where skin meets the same shoe edge hundreds of times during a walk. Friction scrapes the skin surface, concentrated pressure compresses one small area, and heel movement drags skin up and down. A stiff heel counter or ankle collar can act like a hard rim against your ankle.
Your rubbing location narrows the cause faster than random padding. Inspect both shoes after a five-minute indoor walk, then compare both ankles. A curled sock seam, a slightly larger foot, or one bent collar can explain why one side hurts.
| Rubbing location | Likely shoe issue | Useful starting response |
|---|---|---|
| Back of the heel | Heel slippage or extra volume | Use secure lacing or a slim heel grip |
| Achilles area | Rigid heel counter or collar edge | Cover the skin and soften the contact area |
| Ankle bone | High collar, seam, or narrow opening | Use a thin barrier or choose another collar shape |
| Top edge of collar | Collar height, tight lacing, or stiff trim | Loosen upper eyelets and inspect the edge |
Movement and pressure leave different marks
A sliding heel leaves a rubbed stripe or blister at the back of your ankle. Pressure from a tight collar leaves a sharply placed red dent, sometimes before you walk far. That distinction matters because extra cushioning can make a narrow opening tighter.
Example: a sneaker feels loose at the heel but rubs during stairs. Your heel is lifting, so a heel-lock lace pattern targets the cause. A boot that bites the ankle bone while you stand has a shape or stiffness problem instead.
Until that mismatch is corrected, protecting the irritated spot prevents a brief trial from creating a larger wound.
Skin Needs Protection Before Another Fit Trial
Raw skin cannot give you a clear fit signal because each adjustment feels worse against an active sore. Stop wearing the pair long enough for the hot spot to settle, gently clean the area, and cover it before a short indoor trial. Your skin needs a calm baseline before you judge the shoe.
Blister bandages and padding serve different roles inside a shoe. A barrier limits skin-on-shoe rubbing, while a volume-filling pad changes the space around your foot. Match your choice to the cause at the collar or heel.
| Option | Main role | Effect on shoe space |
|---|---|---|
| Moleskin padding | Shields a small hot spot from friction | Minimal, based on thickness |
| Hydrocolloid blister bandages | Cushions and covers intact blisters | Very little change |
| Silicone heel sleeves | Reduces rubbing around heel skin | Uses noticeable volume |
| Gel heel grips | Fills extra heel space and reduces slip | Reduces heel room |
| Shoe-mounted padding | Covers a rough seam or hard interior edge | Reduces space at that exact point |
Padding has clear limits
Compeed blister bandages use hydrocolloid material that cushions an intact blister while keeping it covered. Band-Aid blister products serve a similar role. Moleskin can shield nearby skin, but cut an opening around a raised blister rather than pressing adhesive onto its roof.
Spreading redness, warmth, pus, fever, worsening pain, diabetes, or poor circulation calls for prompt medical guidance. Stop home adjustments until a clinician or podiatrist has checked the skin.
Petroleum jelly can reduce rubbing on intact skin during a brief trial, yet it cannot correct a shoe that presses too tightly. Keep it away from suede or fabric uppers because an oily mark can remain. Your shoe still needs a fit correction after the trial.
Loose Heels and Tight Collars Need Opposite Adjustments
Extra heel room and a narrow ankle opening call for opposite responses. Shoes rubbing the back of the ankle from slippage need your heel held down, while a tight heel collar needs less pressure against your skin. Adding bulk to the wrong problem can intensify the rubbing.
Loose heels need less movement
Use the top eyelets for a heel-lock lace pattern, also called runner’s loop lacing. The small loops add hold around your ankle without tightening the entire forefoot. Your heel should stay seated during a short walk instead of rising at each step.
- Check heel lift Lift your toes and walk ten steps; visible heel rise points to lacing or extra volume.
- Use slim grips Add gel heel grips only where real space exists behind your heel.
- Skip thick insoles A bulky insole can lift your heel into the collar and form a new rub point.
- Retie upper laces Keep lower laces comfortable, then secure the top two eyelets more firmly.
Dr. Scholl’s heel cushions can reduce extra space in a loose shoe, but they do not suit every fit problem. A heel grip inside an already snug shoe can push your ankle forward and turn mild rubbing into sharp pressure. You need space behind the heel before adding a grip.
Tight collars need room and surface softness
A tight edge calls for targeted softening rather than layers of padding. Press the empty shoe collar with your thumb. A rigid plastic-backed heel counter resists change far more than a leather edge, and its shape can remain wrong for your foot.
Leather conditioner can soften the surface of leather around the collar, though it does not reshape the heel counter. Shoe stretching spray and a shoe stretcher can help some leather or synthetic uppers. Keep the stretch local and modest, away from glued seams.
Small Fit Changes Reveal Whether the Shoe Can Work
A smooth sock can solve a problem that looks like a shoe defect. Turn the sock inside out, check for a ridge behind your heel, then reposition it before adding adhesive padding. Your skin should not sit over a thick seam fold.
A short indoor sequence exposes poor fixes
- Smooth the sock Pull fabric flat around your heel and ankle to remove folds that create shear.
- Cover rough seams Place thin shoe-mounted padding over an interior seam, not over an already tight collar.
- Lock the heel Retie upper eyelets until your heel stays planted without numbness or pinching.
- Walk indoors Take a five- to ten-minute walk on a clean floor and inspect your skin afterward.
- Change one item Remove or alter one item at a time so you can identify what changed the rubbing.
Thick socks reduce shear and absorb sweat during break-in, especially in roomy leather boots. Moisture-wicking socks also limit damp, softened skin that blisters more easily. Your tight shoe collar needs a thin, smooth sock because extra fabric takes up the small amount of room around your ankle.
Example: a high basketball-style collar catches your ankle bone despite secure laces. A thin blister bandage or moleskin barrier can shield that point, but a lower collar shape is the lasting answer. A loose heel needs less movement, not extra cushioning.
Whether controlled wear will help depends on the upper material, since not every shoe softens or stretches predictably.
Gradual Wear Works Differently Across Shoe Materials
New material softens through controlled wear rather than an all-day push through pain. Short indoor sessions show whether the contact point is easing or becoming raw. You can stop early before a mild red spot becomes broken skin.
Short sessions limit skin damage
- Days one and two Wear the shoes indoors for 10 to 15 minutes with the socks you plan to wear.
- Days three and four Move to 20 to 30 minutes only after your skin has no lingering hot spot.
- Days five through seven Try a short outdoor errand, then inspect the heel and ankle collar right afterward.
- Pause at redness Stop the schedule after soreness, rubbing, or broken skin rather than adding more wear time.
Leather can yield slightly with gentle stretching, while suede needs a lighter touch because moisture and force can mark its nap. Canvas and mesh soften more than they stretch. Synthetic leather varies, and rigid plastic-backed heel counters rarely change enough to solve a shape mismatch.
Skip aggressive heat, soaking, and forced stretching. Hair dryers can weaken adhesives, water can distort materials, and permanent changes can close your return window before you know whether the fit works.
Shoe Goo can reattach a loose interior edge or peeling lining after the area is clean and dry. It cannot make a hard heel counter flexible, and it should not sit where your skin rubs against a raised glue ridge. Your repair should leave a smooth interior surface.
Repeated Pressure Signals a Return or Professional Visit
Persistent pressure in the same quarter-inch spot is stronger evidence than a hopeful break-in plan. A shoe can work where a thin barrier and modest adjustment remove rubbing. A shoe last or collar shape is wrong where that spot returns every time.
Indoor evidence preserves your options
Keep the outsole clean during fit checks and retain the box, inserts, and packing materials. Discomfort during a short indoor walk tells you more than forcing an eight-hour day because raw skin can hide the original fit problem. Your return window matters before stretching or glue changes.
- Return the pair Choose this route after repeated pressure at the same point despite a lace change or thin barrier.
- Visit a cobbler Seek professional work for sound leather shoes needing limited collar stretching or seam repair.
- See a podiatrist Seek care for recurring blisters, broken skin, altered sensation, or conditions affecting circulation.
- Retire the shoes Stop wearing shoes that reopen skin or cause pain that changes your gait.
Your clearest next step is another five-minute indoor walk after one targeted adjustment. That process shows how to stop shoes from rubbing your ankles without hiding a poor fit under increasingly bulky padding. A repeated mark means the shoe shape needs a different answer.
Key Takeaways for Ankle Rubbing
The useful fix comes from the exact mark the shoe leaves on your skin. Control heel movement in a loose shoe, create room around a tight collar, and shield irritated skin before another trial. Once a pair keeps rubbing the same point after modest changes, your foot is not the problem. The shoe shape is.
FAQ
Why do my shoes rub against my ankles?
Your shoes rub because friction, pressure, heel movement, or a stiff edge keeps contacting the same skin area. A loose heel drags skin against the heel counter, while a tight or high ankle collar presses one spot. Inspecting the exact mark helps you choose the right correction.
How can I stop shoes from rubbing my ankles without buying new shoes?
Start with one small change: smooth the sock, use heel-lock lacing for heel lift, or place a thin barrier over a rough contact point. Your shoes can become more comfortable where the issue is minor heel movement or a slightly stiff leather collar. Repeated pain at one spot points to a shape mismatch.
What can I put on the back or collar of a shoe to prevent blisters?
Shoe-mounted padding can cover a rough interior seam or hard edge. Gel heel grips work only where your heel has extra room, while moleskin and blister bandages shield skin rather than filling shoe space. Your padding should stay thin near a narrow ankle opening.
How do I soften the back of my shoes?
You can soften leather gradually with short wear sessions and a small amount of leather conditioner on the exterior collar area. A shoe stretching spray and shoe stretcher can help suitable leather or some synthetic uppers. Your rigid plastic-backed heel counter may not soften enough for a meaningful change.
Can I stretch shoes around the ankle opening?
A cobbler can stretch some leather collars and uppers in a small, focused area. Shoe stretching spray and a shoe stretcher can help where the material has room to yield. Rigid plastic-backed heel counters and glued seams have far less give, so your result can be limited.
What is the best way to break in new leather shoes without hurting my feet?
Wear new leather shoes indoors for 10 to 15 minutes, inspect your skin, and add time only after the prior session leaves no hot spot. Your moisture-wicking socks can reduce damp friction, while a thin blister bandage shields a known contact point during the break-in period.